Explore
Unlock maps, services and gathering routes.
Everything players need to understand tiers, maps, combat, professions, special events, dungeons, equipment, party play, and the website systems.
Current concise guide
Progress through eight world tiers, improve combat and profession levels, build a seven-slot skill loadout, refine resources into equipment and take that build into dungeons, world events, parties and competitive minigames. Use the categories on the left to explore one connected system at a time.
Unlock maps, services and gathering routes.
Refine, craft and shape your skill loadout.
Enter dungeons, events and minigames.
Combine traits, skill trees and equipment.
World tiers
| Tier | World map | Required level | Progression role |
|---|---|---|---|
| T1 | Brightwood | Level 1 | Starting city, first resources, stations, shops and Shadow Cavern. |
| T2 | Whispering Meadowlands | Level 10 | First world unlock, T2 professions and Whispering Hollow. |
| T3 | Frost Valley | Level 20 | Cold-region progression with T3 resources, enemies and equipment. |
| T4 | Sunspire Vale | Level 30 | T4 progression and the highest city currently available through quick travel. |
| T5 | Dragonwood | Level 45 | Higher-tier portal route and the first level-45 profession tier. |
| T6 | Ember Wastes | Level 60 | Level-60 resources, recipes, loot and generator tier. |
| T7 | Umbral Expanse | Level 75 | Late-game T7 progression, including Void and Umbral materials. |
| T8 | Celestial Frontier | Level 90 | Endgame tier for the strongest resource, recipe and equipment progression. |
Navigation
The in-game world map is opened with M. It shows the current scene, your player marker, useful town markers, resource markers, mob markers and travel destinations. The map can be dragged, zoomed and filtered so players can decide where to gather, fight, repair, bank or trade next.
The world map offers direct city travel between Brightwood, Whispering Meadowlands, Frost Valley and Sunspire Vale. It checks combat level, finds a safe landing position and charges 500 money for each tier crossed.
When no frenzy is active, the game can roll for Gathering, Combat, Refining or Crafting Frenzy. Only one frenzy can be active at once.
Tomes are bonus drops from combat, gathering and refining. Using one gives a four-minute XP buff; another tome replaces the active tome buff.
World events
Special gathering nodes are shared world spawns for ore, trees and fibre. The current special-node setup rolls at 5% per minute, uses server sync, announces a spawn, and can have many ticks before disappearing.
Normal gathering nodes can spawn a guarding mob while you gather. This is automatic and scales by node tier, so higher-tier nodes are more dangerous without needing every prefab to be hand-configured.
Special mobs are global spawns with tracked damage. Solo players and parties can both compete, and party damage is grouped for reward ownership.
Daily bosses and special combat spawns give maps a repeatable pressure point. Boss damage, reward ownership and party contribution are tracked so both solo and party play can participate.
Personal island
Your owned island is a personal, editable area reached by boat from Brightwood. Open the island editor to reshape the ground with tiles, decorate the area, place useful buildings, add mobs you have unlocked, and manage resource-node objects. Your island layout is saved for your character and loads again when you return.
Choose Tiles in the island editor to paint sand and fence tiles onto the island grid. Use erase mode to remove your placed tiles. The separate Objects catalog is for decorative island props; placement previews show where an item will land before you confirm it.
Choose Place Building to add functional stations to your layout. The catalog includes crafting and refining buildings, the bank, salvage station and repair station. Select a building, position its preview on valid island ground, and confirm the placement.
Choose Place Mobs to populate the island. The mob catalog follows your progression: only mobs at or below your current placement level are shown. Pick a mob, check its preview and place it in the area where you want it to appear.
Choose Place Node Objects to use resource-node objects from your inventory. Nodes must be placed at least 2.5 units apart and node-object items have a maximum stack size of 1.
Placed nodes behave like normal gathering nodes. Click to gather, or press E nearby to pick an available node back up. Depleted or respawning nodes cannot be picked up and return after their normal respawn time.
Tiles, objects, buildings, mobs and nodes persist per character. The editor also includes Other Characters for visiting another character's island; visitors cannot edit the owner's layout.
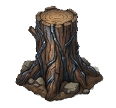
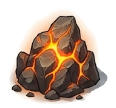

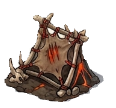
| Tier | Node object drop chance per depletion | Drop result |
|---|---|---|
| T1 | 1.00% | A depleted T1 placed node can drop that same T1 node object. |
| T2 | 0.864% | A depleted T2 placed node can drop that same T2 node object. |
| T3 | 0.729% | A depleted T3 placed node can drop that same T3 node object. |
| T4 | 0.593% | A depleted T4 placed node can drop that same T4 node object. |
| T5 | 0.457% | A depleted T5 placed node can drop that same T5 node object. |
| T6 | 0.321% | A depleted T6 placed node can drop that same T6 node object. |
| T7 | 0.186% | A depleted T7 placed node can drop that same T7 node object. |
| T8 | 0.05% | A depleted T8 placed node can drop that same T8 node object. |
| Tier | Log object | Ore or shard object | Fibre object | Hide object |
|---|---|---|---|---|
| T1 | Iron Bark Log Object | Ember Ore Object | Verdant Fibre Object | Ashfang Hide Object |
| T2 | Bloodwood Log Object | Steelspike Ore Object | Sprout Fibre Object | Emberhorn Hide Object |
| T3 | Stormroot Log Object | Umbral Ore Object | Frost Silk Object | Frost Hide Object |
| T4 | Sunspire Log Object | Emerald Shard Object | Crystal Thread Object | Glacial Hide Object |
| T5 | Frostwood Log Object | Sunstone Ore Object | Sun Thread Object | Nightfang Hide Object |
| T6 | Emberpine Log Object | Glacier Shard Object | Sun Fibre Object | Shadowhide Panther Object |
| T7 | Dragonwood Log Object | Void Ore Object | Ash Thread Object | Umbral Panther Object |
| T8 | Lumin Log Object | Stormcrystal Ore Object | Ember Thread Object | Void Serpent Object |
Professions · live rules
Woodcutting, Mining and Harvesting now use the interactive Perfect Hit system on normal world nodes. There is no countdown and the marker does not miss automatically: every click is one gathering tick. Skinning remains a conventional local interaction because its animals must first be defeated.
The moving marker is a CSS illustration of the in-game mechanic—no image asset is required.
| Tier | Required skill | Shared ticks | Perfect-zone centre | Difficulty |
|---|---|---|---|---|
| T1 | Level 1 | 5–8 | 18% | Wide |
| T2 | Level 10 | 4–7 | 17% | Wide |
| T3 | Level 20 | 4–6 | 15.8% | Comfortable |
| T4 | Level 30 | 3–5 | 14% | Moderate |
| T5 | Level 45 | 3–5 | 12% | Narrow |
| T6 | Level 60 | 2–4 | 10% | Hard |
| T7 | Level 75 | 2–3 | 8% | Very hard |
| T8 | Level 90 | 2 | 6% | Precision |
The marker's base speed is the same across tiers; higher tiers become harder by narrowing the scoring zones. “Perfect-zone centre” is the configured distance from the exact centre on each side of the bar.
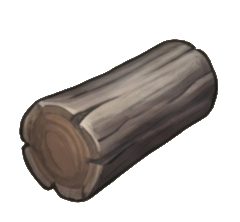
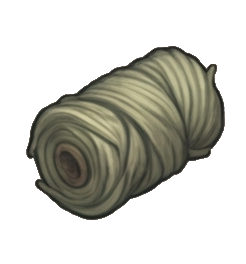
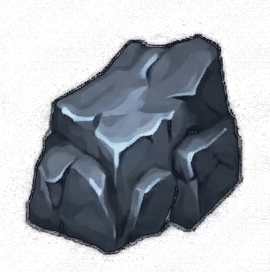
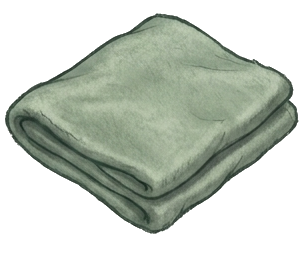
Refining turns raw resources into crafting materials: Smelting makes bars, Weaving cloth, Tanning leather and Lumbermilling planks.
Production
Crafting creates armor and weapons from refined materials. Crafting XP and crafting level count for potion crafting too, so potion progress is part of the same production identity.
Potions and buffs support combat, gathering, refining, crafting and XP. Active buffs are saved and restored while they still have time left. Health potions are instant heals with a 15 second health-potion cooldown; buff potions run for 3-5 minutes depending on the potion.

Instant heal for 15% max health.
Instant / 15s health potion cooldown
Instant heal for 20% max health.
Instant / 15s health potion cooldown
Reduces incoming damage by 20%.
5 minutes
Increases player damage by 18%.
3 minutes
Reduces skill cooldowns by 15%.
4 minutes
Increases movement speed by 18%.
4 minutes
Increases gathering yield by 20%.
5 minutes
15% chance to gain 1 extra gathered resource.
5 minutes
Mining gets 15% extra chance to gain 1 extra ore.
5 minutes
Reduces refining time by 20%.
5 minutes
Reduces crafting time by 15% and adds crafting point bonus.
5 minutes
Reduces incoming damage by 15%.
5 minutes
Increases damage against bosses by 20%.
4 minutes
Adds 7.5% bonus item drop chance and boosts gold.
5 minutes
Makes dash dodges easier with +0.35 dodge-window bonus.
4 minutes
Restores 3% health every 2 seconds.
5 minutes
Increases earned XP by 20%.
5 minutes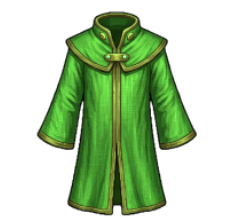
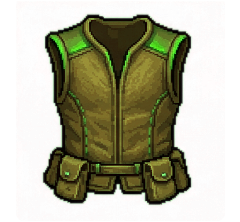
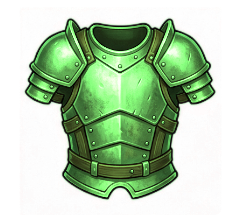
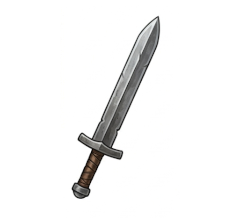
Generators produce resources while your character is online, including while you move between scenes. They pause while offline.
Generator tiers unlock from the matching profession level: 1, 10, 20, 30, 45, 60, 75 and 90.
Maximum capacity by tier: 15 / 12 / 10 / 8 / 6 / 4 / 2 / 1.
Starting cost by tier: 1,000 / 2,500 / 5,000 / 10,000 / 25,000 / 50,000 / 90,000 / 150,000 gold.
Each additional capacity level costs 10% more than the previous one.
Gear
Equipment has four main slots: head, chest, legs and weapon. Armor pieces carry an armor type, while weapons add their own damage, cooldown and resistance points. The character sheet converts those raw gear points into display percentages, and the armor type adds a specialty proc on top.
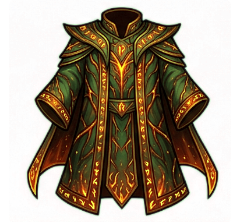
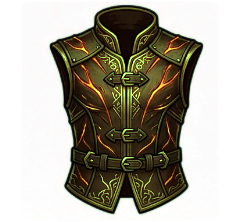
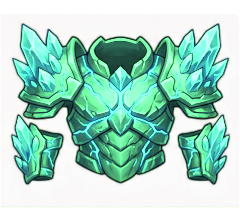
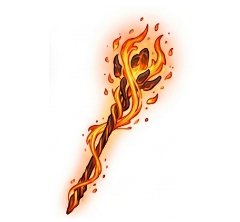
Cloth is the damage-focused armor path. When a skill hits, cloth rolls for an extra damage proc. The proc chance and the extra damage percentage use the same armor formula.
Leather is the cooldown-focused armor path. When you use a skill, leather can proc and force that used skill to its minimum cooldown.
Plate is the defensive armor path. Incoming damage rolls against your plate block chance before resistance is applied. A successful block makes the attack deal 0 damage.
| Armor path | Specialty roll | Head formula | Chest formula | Legs formula | Full T1 | Full T8 |
|---|---|---|---|---|---|---|
| Cloth | Extra skill damage | Tier x 0.625% | Tier x 2.5% | Tier x 1.25% | 4.375% chance / damage | 35% chance / damage |
| Leather | Used skill to 1s cooldown | Tier x 0.875% | Tier x 1.25% | Tier x 1% | 3.125% chance | 25% chance |
| Plate | Block attack for 0 damage | Tier x 0.875% | Tier x 3.75% | Tier x 1.625% | 6.25% chance | 50% chance |
| Full armor set | T1 damage points | T1 cooldown points | T1 resistance points | T8 damage points | T8 cooldown points | T8 resistance points | Stat identity |
|---|---|---|---|---|---|---|---|
| Cloth | 19 | 7 | 7 | 41 | 18 | 18 | Highest armor damage path with extra-damage procs. |
| Leather | 15 | 19 | 10 | 37 | 40 | 21 | Highest armor cooldown path with 1-second cooldown procs. |
| Plate | 12 | 7 | 24 | 33 | 17.5 | 45 | Highest armor resistance path with block procs. |
Equipped gear loses durability when mobs hit you. Higher incoming damage causes more durability loss, and higher-tier equipment lasts longer than lower-tier equipment.
The repair station restores durability on equipped gear or gear in your inventory. Repair price scales with item tier and missing durability, so high-tier broken gear costs more than a lightly damaged low-tier item.
The salvage machine converts inventory items into gold value. Gear value is based on its item type, tier and quality; stackable items use their own salvage values. Higher quality increases gear salvage value.
| Class | Class damage bonus | Resistance multiplier | Cooldown identity | Best armor feel |
|---|---|---|---|---|
| Warrior | +75% | 1.35x | Stable melee tempo | Plate tanking and boss pressure |
| Ranger | +100% | 0.85x | Best fit for leather tempo | Leather cooldown chains |
| Mage | +150% | 0.70x | Burst windows matter most | Cloth burst damage |
| Tier range | Gear examples | Resource feel | Progression meaning |
|---|---|---|---|
| T1-T2 | Linen, Leather, Iron Bark, Bloodwood | Starter resources and first upgrades | Learn your armor identity and start building toward your class style. |
| T3-T4 | Mystic, Frost Wolf, Dragonwood, Shadowhide, Sunspire | Mid-game materials with stronger mixed recipes | Proc chances become noticeable, especially with full matching armor. |
| T5-T6 | Sunthread, Emberhorn, Frostwood, Sunfang, Emberpine | Higher maps, stronger mobs and better crafted sets | Cooldown, block and burst builds start feeling distinct. |
| T7-T8 | Starfall, Ashveil, Lumin, Emberweave, Emberveil, Stormcrystal | Endgame resources and top-tier gear | Full specialty sets reach their strongest proc values. |
Weapon build layer
Weapon traits are extra combat modifiers attached to weapons. A weapon can carry two trait slots, each with a trait level from 0 to 3. They are shown on inventory, bank, marketplace, lootbox rewards and build-planner loadouts, so a weapon is more than only its tier and raw stats.
Treat weapon traits as the final layer on top of class, level, armor type, skill tree branch and potion choice. For example, a boss setup should care about boss traits and sustain, while a mob-wave setup usually values control, crowd pressure, cooldown flow and survival windows.
| Trait | Level I | Level II | Level III |
|---|---|---|---|
| Brutal | +5% weapon damage | +10% | +20% |
| Boss Hunter | +10% boss damage | +18% | +30% |
| Dungeon Bane | +8% dungeon damage | +15% | +20% |
| First Strike | +10% vs full HP | +20% | +35% |
| Executioner | +50% below 20% HP | +60% | +70% |
| Crowd Breaker | +3% per nearby mob | +6% | +10% |
| Lone Hunter | +6% with one mob nearby | +12% | +20% |
| Swift Casting | 3% cooldown reduction | 6% | 10% |
| Battle Rhythm | Every 4th cast: 10% CDR | 20% | 35% |
| Opening Tempo | First casts: 25% CDR | 50% | 75% |
| Relentless | Kills reduce cooldowns 2s | 3s | 4s |
| Boss Rhythm | 15% boss-fight CDR | 20% | 25% |
| Frostbite | 5% freeze chance | 10% | 12.5% |
| Serrated Edge | 8% DOT chance | 12% | 14% |
| Disorienting Force | 5% confuse chance | 10% | 12.5% |
| Vampiric | Heal 5% of damage | 7.5% | 12.5% |
| Iron Vitality | +10% max HP | +15% | +20% |
| Last Stand | +15% damage below 30% HP | +25% | +32.5% |
| Guardian Strike | +5% resistance after damage | +10% | +15% |
| Second Wind | Kills restore 15% max HP | 25% | 30% |
| Unbroken | +20% damage above 90% HP | +35% | +45% |
Build identity
The skill tree turns level progress into build identity. Each class has three branches, every named node has a stronger second rank, and each individual node can hold up to 20 points. Once a build spends points in one branch for that class, the other branches are locked for that build.
| System | Current rule | Why it matters |
|---|---|---|
| Points per node | Maximum 20 points per node. | Builds can specialize without one click maxing a node instantly. |
| Second ranks | Every base node is followed by a stronger rank with a later level requirement. | A branch continues to grow between its major unlock milestones. |
| Branch locking | Spending points in one branch locks the other branches for that class. | A Mage cannot mix Frost Control and Arcane Burst in the same planned build after committing points. |
| Unlock levels | Nodes unlock at their listed character-level milestones. | Low-level builds stay realistic when shared. |
| Build sharing | Shared builds are fixed snapshots with equipment, weapon traits, notes and view counts. | Changing your character later does not rewrite an already shared build link. |
Custom combat loadouts
Every class has 27 available skills: seven core abilities and twenty additional abilities unlocked while levelling from level 5 through level 90. Your action bar still has seven active slots on hotkeys 1-7, so the important choice is which seven skills you bring. Open Escape Menu → Character → Skillbar, select an unlocked skill and assign it to a slot.
Decide what the loadout needs to accomplish before choosing seven active skills. Boss fights reward reliable pressure and survival, while mob waves benefit from area damage, control and ways to reposition.
Mix shorter cooldowns with stronger situational abilities. Filling every slot with long cooldowns can leave the character without a useful response at an important moment.
Look for abilities that support one another. Control can create room for a slower attack, mobility can make an aggressive setup safer, and healing or damage reduction can keep sustained builds active longer.
These identities are starting points, not fixed roles. The selected skills, equipment, traits and skill-tree choices determine how a class actually plays.
| Activity | Useful priorities | Common mistake |
|---|---|---|
| Boss fights | Sustained damage, recovery, defensive timing and dependable cooldown coverage. | Choosing only burst skills and having no answer during cooldown windows. |
| Mob waves | Area damage, crowd control, mobility and tools that remain useful against several targets. | Building entirely around single-target damage. |
| Dungeons and parties | A clear role, complementary effects and enough survival to keep contributing. | Ignoring what the rest of the party already provides. |
| Solo exploration | A flexible mix of damage, movement and sustain with little downtime. | Using a highly specialized setup for every encounter. |
Loot and enemy scaling
Mobs use tier-based loot. A tier 1 mob can roll tier 1 loot. Higher-tier mobs can roll loot from their own tier and earlier tiers, so a tier 4 mob can still drop lower-tier materials while also adding tier 4 drops. Dungeon mobs get better loot odds, special mobs can multiply loot odds, and Lucky Drop adds a flat bonus to item drop chance.
| Loot type | Base T1 chance per item | Base T2 chance per item | What it means |
|---|---|---|---|
| Unrefined materials | 5% | 3% | Best common material drops: logs, ore, fibre and hides. |
| Potion ingredients | 3.75% | 2.25% | Herbs and ingredients for potion crafting. |
| Refined materials | 3.25% | 1.95% | Planks, bars, cloth and leather. |
| Tools | 1.25% | 0.75% | Tier tools for gathering professions. |
| Gear and weapons | 0.9% | 0.54% | Armor pieces and weapons are rarer than materials. |
| Tier | Base tier chance | Unrefined | Refined | Potion ingredients | Tools | Gear |
|---|---|---|---|---|---|---|
| T1 | 5% | 5% | 3.25% | 3.75% | 1.25% | 0.9% |
| T2 | 3% | 3% | 1.95% | 2.25% | 0.75% | 0.54% |
| T3 | 1.8% | 1.8% | 1.17% | 1.35% | 0.45% | 0.324% |
| T4 | 1.08% | 1.08% | 0.702% | 0.81% | 0.27% | 0.194% |
| T5 | 0.648% | 0.648% | 0.421% | 0.486% | 0.162% | 0.117% |
| T6 | 0.389% | 0.389% | 0.253% | 0.292% | 0.097% | 0.070% |
| T7 | 0.233% | 0.233% | 0.152% | 0.175% | 0.058% | 0.050% |
| T8 | 0.140% | 0.140% | 0.091% | 0.105% | 0.050% | 0.050% |

| Mob level | Loot tier | Health | Attack cooldown | Move speed | Projectile speed | Respawn | Approx normal hit | Approx dungeon hit |
|---|---|---|---|---|---|---|---|---|
| 1 | T1 | 64 HP | 4.00s | 1.00 | 2.00 | 8.0s | 10 | 13 |
| 10 | T2 | 320 HP | 3.70s | 1.30 | 2.51 | 13.3s | 32 | 42 |
| 30 | T4 | 1,760 HP | 3.02s | 1.98 | 3.63 | 24.9s | 82 | 106 |
| 60 | T6 | 6,941 HP | 2.01s | 2.99 | 5.31 | 42.5s | 156 | 203 |
Combat math
Player power comes from level, class, gear and active buffs. Gear damage, cooldown and resistance are recalculated when equipment changes, then shown on the player stats UI.
Mobs scale by level. Higher-level mobs attack faster, move faster, shoot faster projectiles, respawn slower and give the player a shorter dodge window.
Competitive activities
Open Escape Menu → Activities → Minigames to queue for Red Light Green Light, one of five competitive arena challenges, or Gathering Frenzy. Multiplayer matches use server-authoritative objectives and stats; Mob Waves remains a separate solo activity.
| Minigame | Objective | Useful tip |
|---|---|---|
| Treasure Rush | Collect 12 shared treasures before the opponent. | Each collected treasure moves for both players, so route quickly toward the new marker. |
| Dodge Storm | Survive moving hazards with three lives. | You begin with five seconds of immunity; a hit gives three seconds of protection. Survive at least one minute to remain reward-eligible. |
| Zone Keeper | Spend a total of 25 seconds inside the moving green zone. | Anticipate the zone change instead of waiting at the previous centre. |
| Gathering Frenzy | Score the most tier points in two and a half minutes while keeping the gathered resources. | Bring usable tools and unlocked profession levels; T8 nodes are rare and worth 8 points. |
Tier weights: 60 / 15 / 10 / 7.5 / 5 / 3.5 / 2 / 1 are relative weights and are normalized by the server. They express rarity, so they do not need to total 100.
Optional combat challenge
Mob Waves are focused arena challenges opened from the game menu or keybind. Choose a mob, pick a difficulty from 1 to 10, then start a wave run when you want direct combat practice or a higher-pressure build test. Mob waves cannot be started while in a party.
Reward containers
Lootboxes are tiered reward containers. Each type has its own item pool and price curve, and a tier must be unlocked by the matching required character level before it can be opened.
| Lootbox type | Contains | Main odds feel | Important note |
|---|---|---|---|
| Resource Lootbox | Unrefined and refined materials for that tier. | Unrefined common, refined uncommon, bigger stacks rare. | Useful when you are short on crafting inputs. |
| Potion Lootbox | Potions and potion ingredients for that tier. | Ingredients common, finished potions uncommon, extra stacks rare. | Good for combat prep and profession boosts. |
| Gear & Weapon Lootbox | Only gear and weapons for that tier. | Gear common, weapons uncommon, higher quality rarer. | Weapons can roll one trait at 25% chance or two traits at 12.5% chance. |
Open Escape → Activities → Lootboxes, choose the box type and an unlocked tier, review its contents and cost, then confirm. The server performs the roll and adds the confirmed reward to your character.
Lootbox tier access uses the same tier requirement logic as other character progression. Higher-tier boxes cost more and produce higher-tier items.
Gear and weapons can roll quality. Good and Excellent are more common than Epic and Masterpiece, and quality affects how valuable the item feels in equipment, marketplace and salvage contexts.
Use Crafting Recipes to check material requirements. Use Marketplace for listings, price history and active economy signals.
PvE
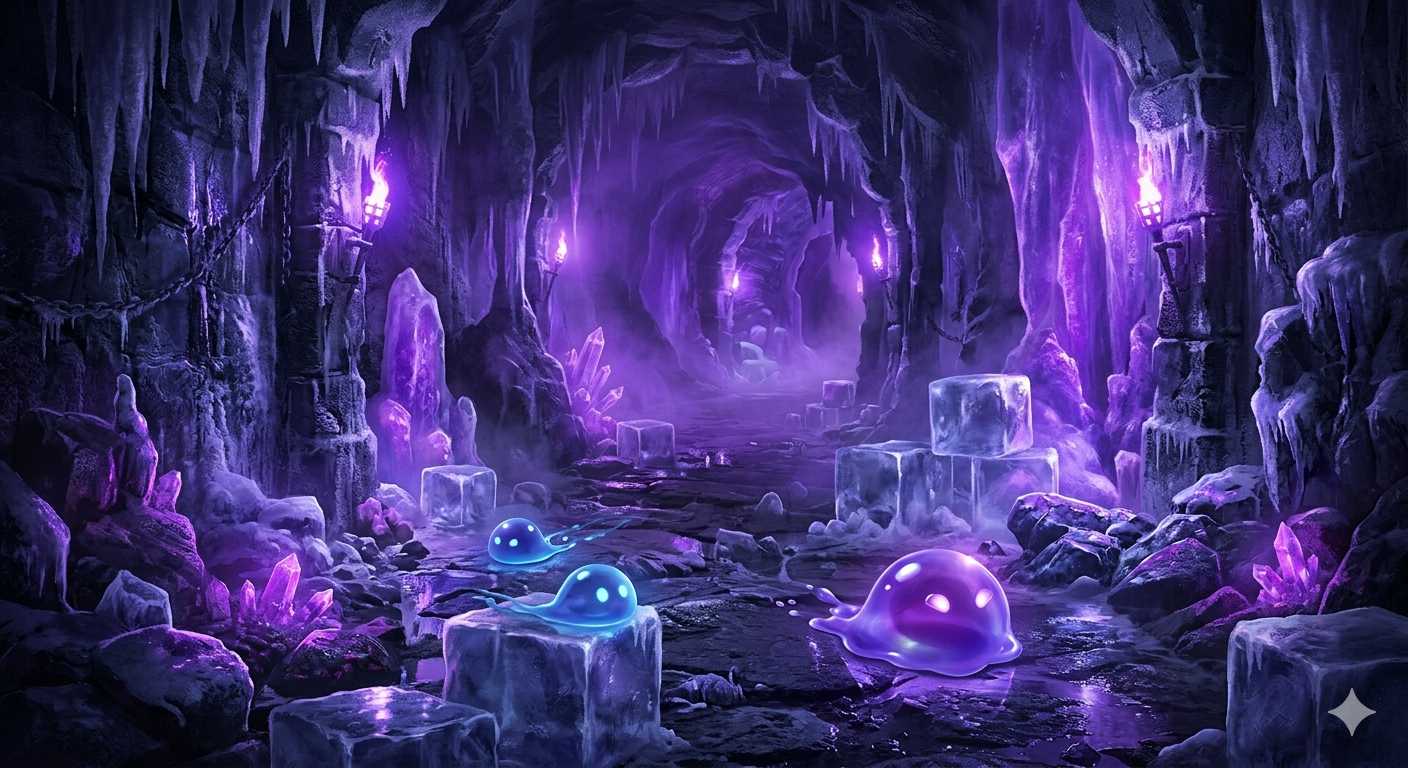
Dungeons are tiered combat areas. You clear mobs, push kill progress, fight the boss and claim reward chests. Party boss kills, opened doors, points and timer state can sync so group play stays consistent.
Dungeon-boss rewards are collected through the end chest. Each party member sees only the items and gold assigned to that character.
Boss loot is assigned server-side before claiming. Players cannot take another member's allocation, stack quantities can be divided, and Take All only claims your own share.
If your share contains only gold, claiming the gold completes the chest. If it contains nothing, the dungeon can be left immediately.
Matchmaking
Open Escape → Social → Dungeon Finder. Select an unlocked dungeon and choose a group size from two to five players. You can keep exploring while queued; the compact queue panel in the lower-right shows the dungeon and current player count. When enough eligible players are found, the game creates the party and moves the group into the dungeon.
| Tier | Dungeon | Combat | Smelting |
|---|---|---|---|
| T1 | Shadow Cavern | 1 | 0 |
| T2 | Whispering Hollow | 12 | 5 |
| T3 | Glacier Depths | 22 | 8 |
| T4 | Temple of the Eternal Sun | 32 | 12 |
| T5 | Heartroot Sanctuary | 47 | 18 |
| T6 | Molten Core Sanctum | 62 | 25 |
| T7 | Voidheart Citadel | 77 | 30 |
| T8 | Sanctum of the First Stars | 92 | 35 |
Daily progression
Open the Monthly Ledger with N or through Escape → Progress → Monthly Rewards. Each calendar day has one server-tracked task and a reward. Select today's tile to inspect progress and claim it after completion.
Tasks rotate between logging in, defeating mobs, gathering, refining, crafting and clearing a dungeon. Progress is attached to the current character and updates from the real activity systems.
Only today's completed reward can be claimed. Future days stay locked and missed days remain missed, so an old day cannot be completed later. Rewards can contain gold, items, or both.
Every consecutively claimed day in the current month adds +1% extra loot. Missing a day breaks the streak. The ledger shows whether a day is ready, claimed, missed, locked or still incomplete.
Online play
Chat supports global messages, party messages, local say messages and direct player whispers from the online player dropdown or friends list.
Parties support invites, accept/decline, leaving, leader-only invites and kicks, party chat, shared combat state, boss registration, gold sharing and loot sync. World gathering itself is synchronized independently of party membership.
The in-game social menu lets players search names, send friend requests, accept or decline pending requests, remove friends, whisper online friends and send paid mail.
Competitive open world
PvP zones are dangerous open-world maps where other adventurers become real opponents. Darkwood is the first dedicated PvP destination: enter through its world portal, prepare your loadout before crossing over and watch the battlefield rather than only the path ahead.
For the first 30 seconds after entering a PvP map, a player cannot attack or receive player damage. Protected arrivals and their projectiles stay hidden from combatants until the protection ends, preventing attacks during loading or spawning.
Enemy players use red markers, party members use light blue, and guild members use dark green. These relationship colors remain useful outside PvP as well, so allies are immediately recognizable.
Warriors gain extra movement speed in PvP and use a visible melee radius. Their defense against projectiles becomes strongest at close range, while long-distance hits deal their normal damage. Defeated players can leave a public gravestone containing surviving dropped items.
Optional player challenge
Duels turn any suitable meeting in the open world into a focused one-versus-one fight. Right-click another player, choose Duel, and decide whether the match is for honor, gold, items, or a combination of both.
Both players see the selected quantities and gold before the fight. Each side must lock its own offer; changing an offer requires a new confirmation. A duel can also be played with no wager at all.
A three-second countdown begins once both offers are locked. The fight uses a visible 25-metre arena, a dedicated health display and the normal skillbar. Health does not regenerate during the duel, and leaving the arena can cost the match.
Freeze, confusion, damage over time, lifesteal and other skill effects carry into duels, with one control effect active at a time. Mage and Ranger receive extra duel range, while Warrior receives extra movement speed and a visible melee radius.
When one player is defeated, the result screen clearly names the winner and loser. Agreed items and gold move automatically to the winner, while the result panel shows exactly what was won.
Persistent communities
Open Escape → Social → Guild to create or join a persistent guild. Founding a guild costs 10,000 gold; guild names and tags must be unique. Joining a public guild sends one character-specific request that a permitted guild member must accept or decline.
Roles are Leader, Officer, Veteran and Member. The leader can configure each non-leader role separately.
Daily and weekly contracts clearly show their reset time, target, progress and reward. Completed contracts add Guild XP and gold to the shared treasury when claimed by an authorized role.
Choose one unlocked world region and contribute matching guild activity until the displayed weekly end time. Available regions cover Brightwood through Celestial Frontier.
Gold and items are stored server-side. Quantity selectors let members deposit or withdraw part of a stack when their role permits it.
The Guild Island button travels to the guild leader's owned island as a meeting place. The island owner retains edit access, and leaving returns each visitor to the world location saved before travel.
Select Guild in the normal chat dropdown. Messages appear in green as [Guild] Name: message to permitted guild members—there is no separate Guild chat window.
Rankings
Open Escape → Social → Leaderboard. Rankings are paginated in groups of ten, with Previous and Next controls at the bottom. The website Leaderboard page uses the same server data.
Combat Level is selected by default. Use the selector to rank players by:
The table shows rank, player name and level for the selected skill.
Select Red Light Green Light, Treasure Rush, Dodge Storm, Zone Keeper or Gathering Frenzy. Rankings show wins, losses and win ratio. Mob Waves is excluded because it is a solo challenge.
Win ratio = wins ÷ (wins + losses). A new result is recorded once per completed match.
Rank guilds by Guild Level and Guild XP. Rows also show the guild tag and member count; the website Guild tab adds treasury information and a searchable guild name or tag.
Objectives and tracking
Open the Quest Journal with J or through Escape → Progress → Quests. The journal separates story and progression objectives into Main, Skills, Daily, Discovery, Trials, Resources, Wealth, Dungeons and Build categories.
Combat, gathering, refining, crafting, exploration, dungeon and level milestones update from the systems that perform those actions. Completed objectives show their reward and claim state. Progress is stored per character.
The Skills tab is generated from the live gathering, refining and crafting configuration. It shows resource and recipe unlock levels plus the latest yield or material-saving milestone, so the explanation follows the actual calculations.
Track a quest to keep its progress visible during play. The tracker can stay on screen while the full journal is closed, and changing the tracked quest replaces only the previous quest.
In Crafting Recipes, Track shows the materials required, owned and missing. If a recipe needs refined materials, it also shows how much unrefined material is required and already owned. Tracking another recipe replaces the old recipe, not the active quest.
Interface
Keybinds can be rebound in-game, and Escape cancels a rebind.
Press Escape to open the unified menu. Each group keeps related systems together:
Click a category on the left, then a large icon on the right. Opening a destination closes conflicting panels. Resume returns to play; Log Out returns to account flow; Quit Game closes supported desktop builds.
Inventory, equipment, stats, skill tree, traits and Skillbar sit together. Quests, collection log, recipes, monthly rewards and unclaimed rewards form the Progress group.
Minigames, Mob Waves and Lootboxes are grouped under Activities. Audio, controls, chat, mob UI, minimap, other players and language are managed from Settings.
Discovery tracking
The collection log is opened with L and tracks long-term discovery across mobs, items, resources, crafting and dungeons. It gives players a clean reason to revisit older content, complete resource tiers and compare what they have actually found.
Discovery feeds quests, generator unlocks and account planning. If a tier has never been discovered, some progression systems can stay locked until the player earns that discovery in-game.
Storage
Banks provide server-backed storage shared with the website's Loadout & Vault tools. Open a bank in the world, choose a tab and move resources, consumables, tools, gear and weapons without losing their item details.
Select one or more items, then choose the quantity for each selected stack. The quantity panel supports typing a number, minus, plus and All. Confirm only after reviewing every quantity.
Quantity, quality, durability and weapon traits travel with the item. Hover tools and gear to inspect durability before deciding what should remain in the inventory.
An additional bank tab costs 2,000 gold. The server checks the balance before purchase. Tab buttons scroll horizontally when they no longer fit, and the active tab is kept visible.
Player economy
Open a city marketplace, choose Escape → Social → Marketplace, or visit the website Marketplace. Listings use the server economy, so orders and purchases remain consistent between the game and website.
| Action | How it works | Check before confirming |
|---|---|---|
| Browse | Search and filter active offers by item or category. | Item quality, durability, traits, quantity and total price. |
| Buy a sell order | Select the amount you want from another player's listing. | Your gold and available inventory space. |
| Create sell order | Select an inventory item, quantity and price per item. | Correct stack, metadata and final total. |
| Create buy order | Choose an item, requested quantity and gold offered per item. | Total gold reserved for the request. |
| Sell into buy order | Fulfil another player's request using matching inventory items. | Requested item details and quantity. |
| My Orders | Review or cancel orders you created. | Cancel only the intended active order. |
Website
Inspect character equipment, inventory and bank outside the game. Use it to plan storage and builds while preserving the same item data as the client.
Use leaderboards, forum, shared builds, character profiles and social pages to compare progress and exchange strategies.
The website lets players register, log in, select characters, manage equipment, inventory and bank through Loadout & Vault, view combined character and weekly Stats, use the marketplace, build planner, shared builds, crafting recipes, leaderboard, forum, social pages, downloads and browser play.